Don’t you like that you and your guests have to stay in the garden with difficulty because the lawn is untidy? Aside from the fact that a tidy and well-maintained lawn is always more pleasing to the eye, the state of the lawn also says something about how you like to maintain your home in general. A well-kept lawn is a sign that shows how carefully you take care of the house and your spaces. So in this project, we will see how to fix the garden lawn to put it back in order. To find out how to fix a lawn in bad condition, just follow the steps of this DIY gardening project. You will understand that to arrange the lawn of the garden at home, but also to fix a lawn in general, what is needed is just a little patience and a good dose of application: there are no secrets, just attention, and care to fix the lawn in a ruined garden. We just have to get started!
Step 1: The ruined lawn area fix
To get started, locate the ruined areas of the lawn. Identify the portion of land where you want to start intervening to fix the lawn of the garden, because then you will be able to delimit the area on which to intervene, whether it is the back garden or in front of the house.
Step 2: Look closely
You need to take a closer look at the terrain and mark off the areas you want to work on. In this way, you will have a precise idea of the type of intervention to be carried out.
Step 3: Remove weeds
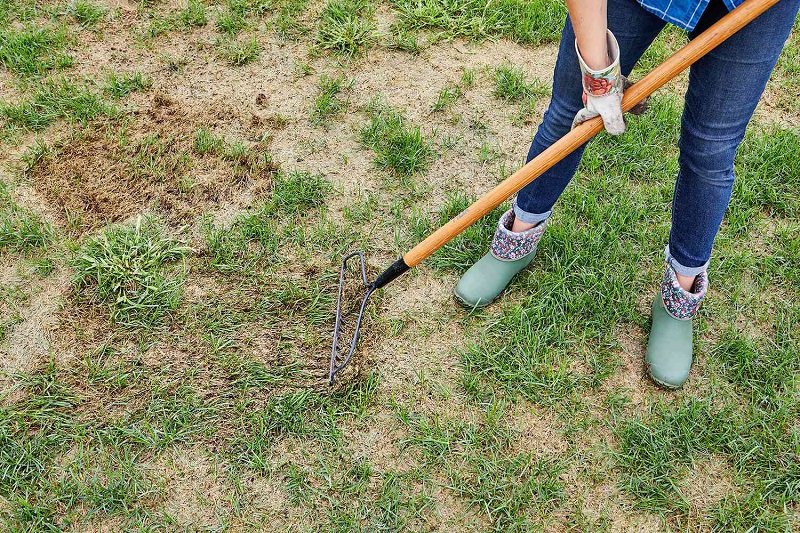
Weeds need to be cleared. Having unwanted plants in your garden would make it look messy and unkempt. You have to take some time to do this. To get rid of weeds, you’ll need a rake, and a fertilizer solution.
Step 4: Continue cleaning
To clean thoroughly and remove weeds you can use a flexible rake or a broom with very stiff bristles to remove both weeds and other debris, then use the hose to hose down the area and use the fertilizing solution on the ruined area of the garden. Then wet the fertilizer solution again with a sufficient quantity of water.
Step 5: Let the sun and air dry the soil
To achieve this, you can also drill holes in the ground. When the soil has been well aerated, it will allow the roots to obtain the nutrients necessary to make the lawn lush.
Step 6: Move the earth with a rake
Use a rake to collect and then move the earth. Be sure to rake the soil so that it flattens out and is even.
Step 7: Start planting
Now that the soil has sufficient nutrients, you can rest assured that the plants will germinate after planting.
Step 8: The area is ready for planting
Now, after the area has been properly aerated, it is ready for planting. That is, the soil will have an
Step 9: Here are the seeds
You must have obtained some seeds to sow to plant the grass. Select seeds that are healthy and not infested with insects. As you can see, I have selected healthy seeds to plant.
Step 10: Different suits
In order for the grass to keep its green color all year round, plant different types of seeds, I used 6 different types.
Step 11: Use 20-40 grams of seeds
The number of seeds per square meter should be between 20 and 40 grams. This will help you control plants and reduce waste.
Step 12: Plant
Plant the seeds in the ground.
Step 13: Add potting soil
An example of soil useful for fixing a ruined lawn is clayey. Clay soils contain the right balance of sand, silt, and clay, and this is helpful when planting seeds.
Step 14: Deploy
Spread the clay soil correctly over the area where you want to plant the seeds.
Step 15: Full Deployment
As you can see, I distributed the loam equally throughout the areas and finished distributing it evenly. Make sure the sod is kept at or even below the level of the previous soil.
Step 16: Press
The best way to properly press the soil is to walk over it continuously for a while until you are sure it is perfect.
Step 17: Now you can water the soil
Now that you have compacted the soil, you can water it because the soil always needs to be properly watered. But be careful not to overdo it.
Step 18: Water moderately
Just like in the previous step, you should avoid overwatering the soil. Everything should be done in moderation. You have to water the soil gently to prevent the plants from rotting. You can use watering cans and spray bottles.
Tip: Make sure you don’t overwater when watering, so the soil doesn’t become waterlogged.
Step 19: Water every day
Make sure you water a little every day. It’s important for a week to water your lawn every day because water is an essential element for plants. If you don’t water the grass, it will eventually wither.
Step 20: The lawn is ready
After a month you should see your lawn ready to mow.
Besides tidying up your garden lawn using seeds, another way to tidy up a lawn is to re-turf it.
How to arrange the lawn by re-turfin
The fastest technique for fixing a damaged turf area is re-turfing. Sod can be laid at any time of the year. Prepare the soil the same way you would for planting. Then, to fit the area, cut a piece of sod from the strip. Press it firmly into the ground, making sure the edges connect evenly with the rest of the surrounding lawn. Step on it to help sink the sods into place. Water generously and frequently until the roots emerge from the soil beneath the root ball.
